Correcting Photo Perspective in Gimp
You have a lopsided photo, of a photo, in a photo album - straighten it up using Gimp!
So, some kind person gives you a photo from the distant past, but (there's always a but!)
It's a photo of a photo in a photo album. The content means a lot to you, but it is very stretched and distorted because the picture of the photo was taken at an angle to the photo album. How do you make it worth using? They didn't even attempt to take the photo with the camera straight on to the page, so it looks like the photo on the left:
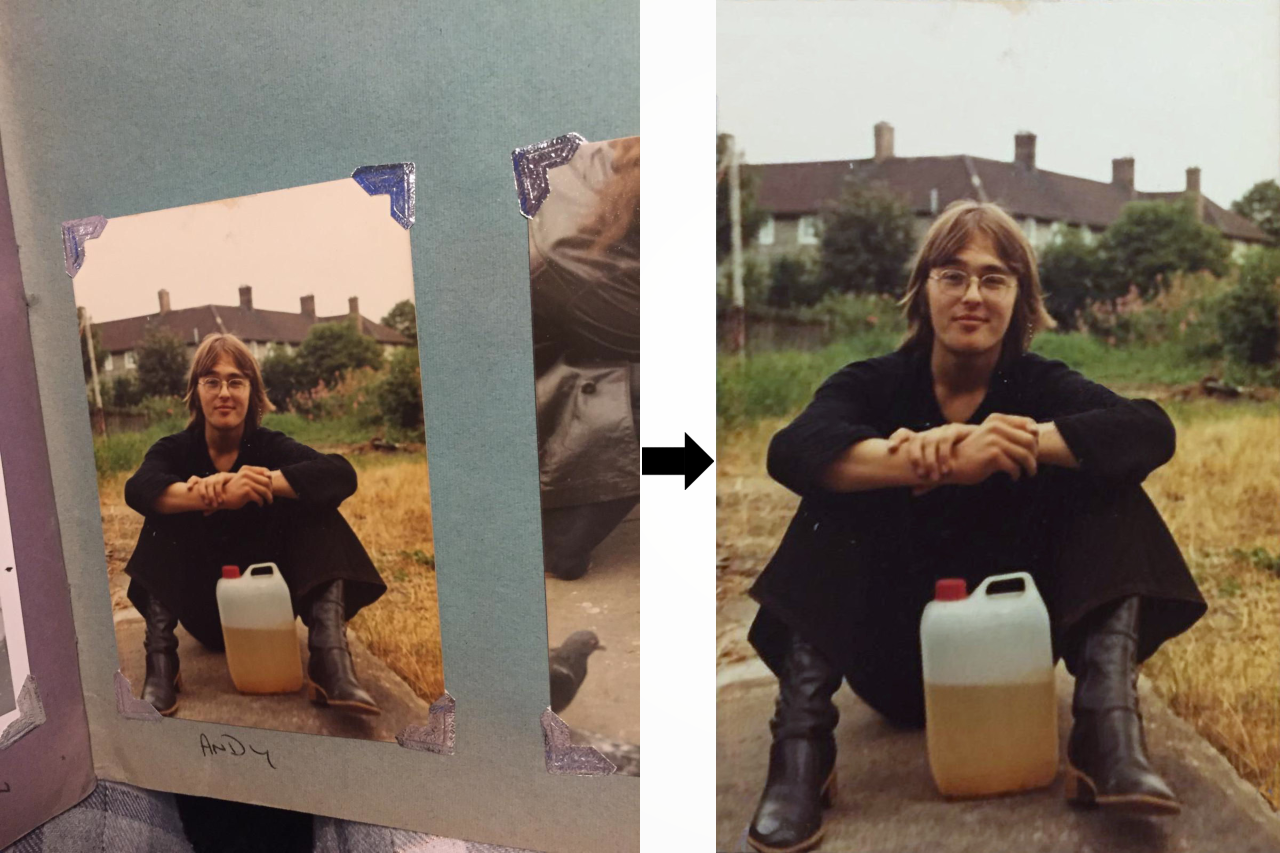
Andy in the photo book, and the final result
Two methods in Gimp
There are (at least) two ways of doing this in Gimp, the first uses the Perspective tool in Corrective mode, the second uses the Handle Transform tool.
The Perspective tool is quicker, but the Handle Transform tool can give more customized results, the image can be resized and aspect ratio can be adjusted while you are busy fixing the perspective.
Preparation
First, whichever method you choose, download and install Gimp, you can find it here: https://www.gimp.org/
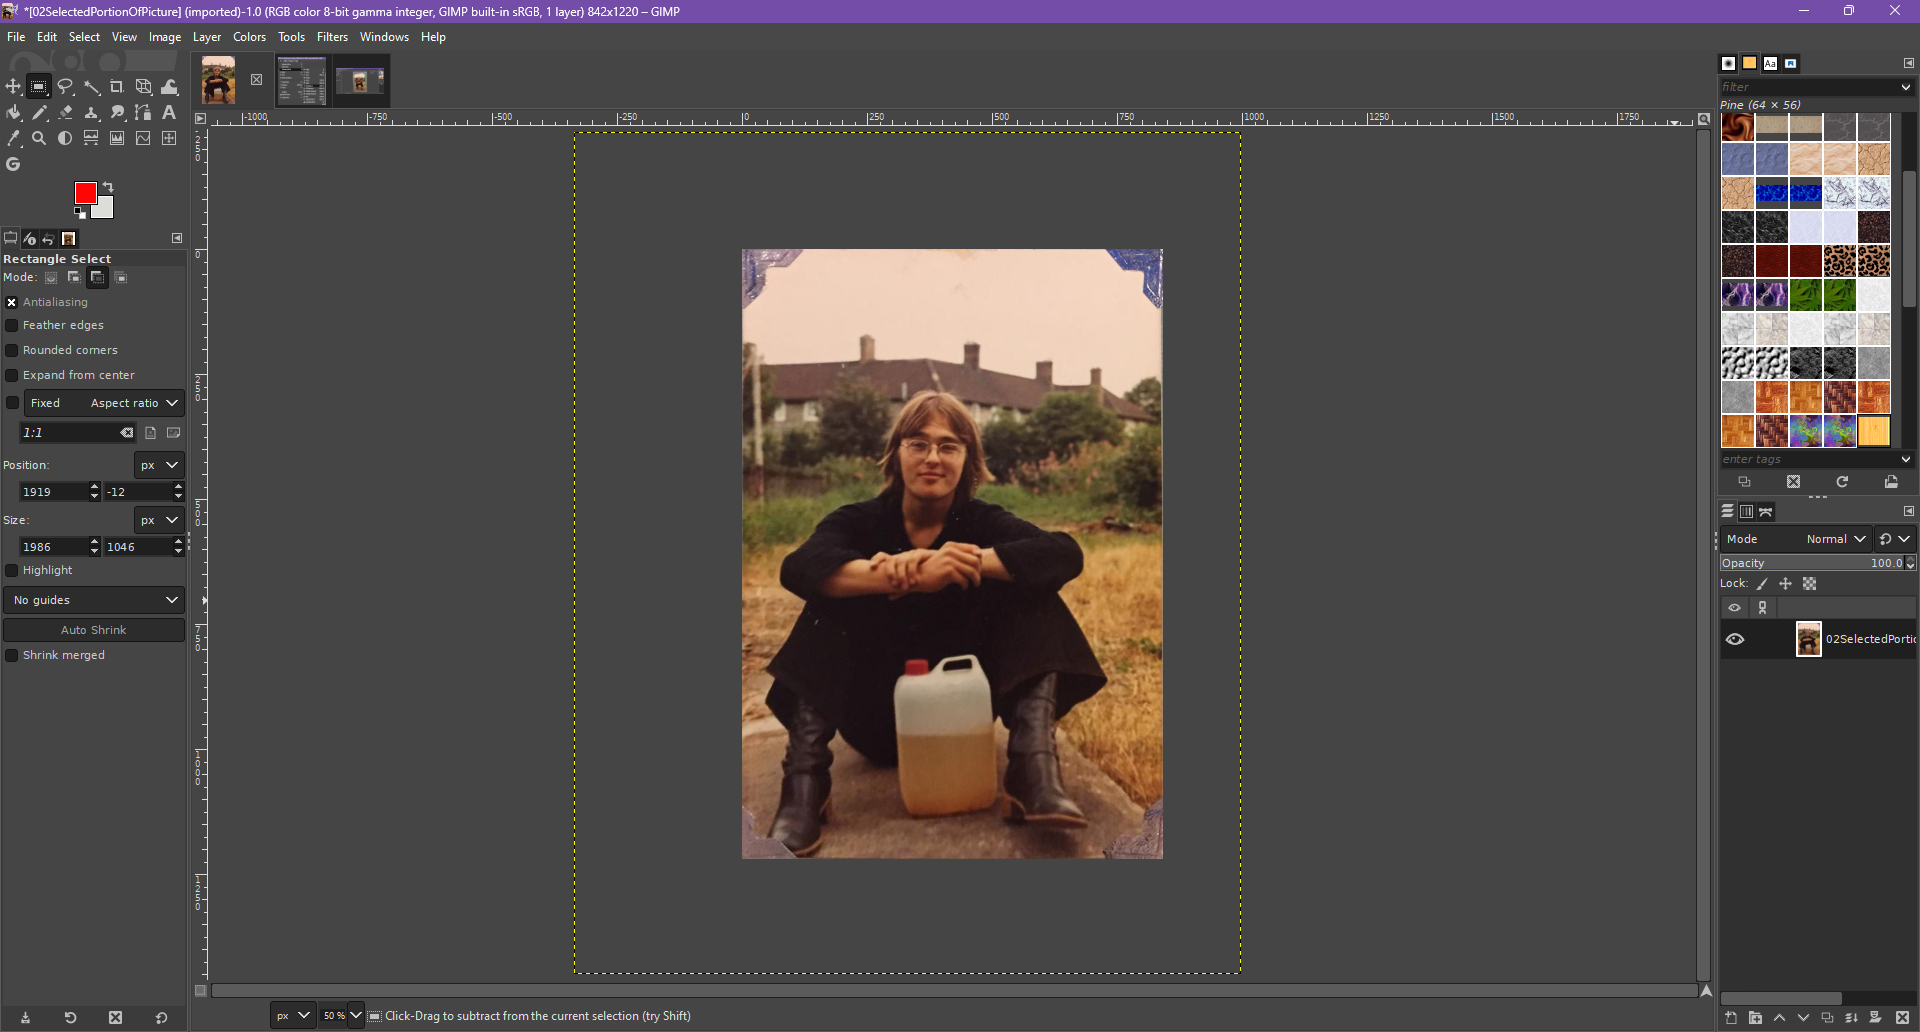
Open a copy of the file in Gimp and use the rectangle select tool,  ,
to select an area from the original picture to work on. My image had lots of unwanted space around
it. So, I included all four corners of the image that I wanted to preserve, with a reasonable border
around it to give room to work. If your image is already trimmed you may not need to do this.
,
to select an area from the original picture to work on. My image had lots of unwanted space around
it. So, I included all four corners of the image that I wanted to preserve, with a reasonable border
around it to give room to work. If your image is already trimmed you may not need to do this.
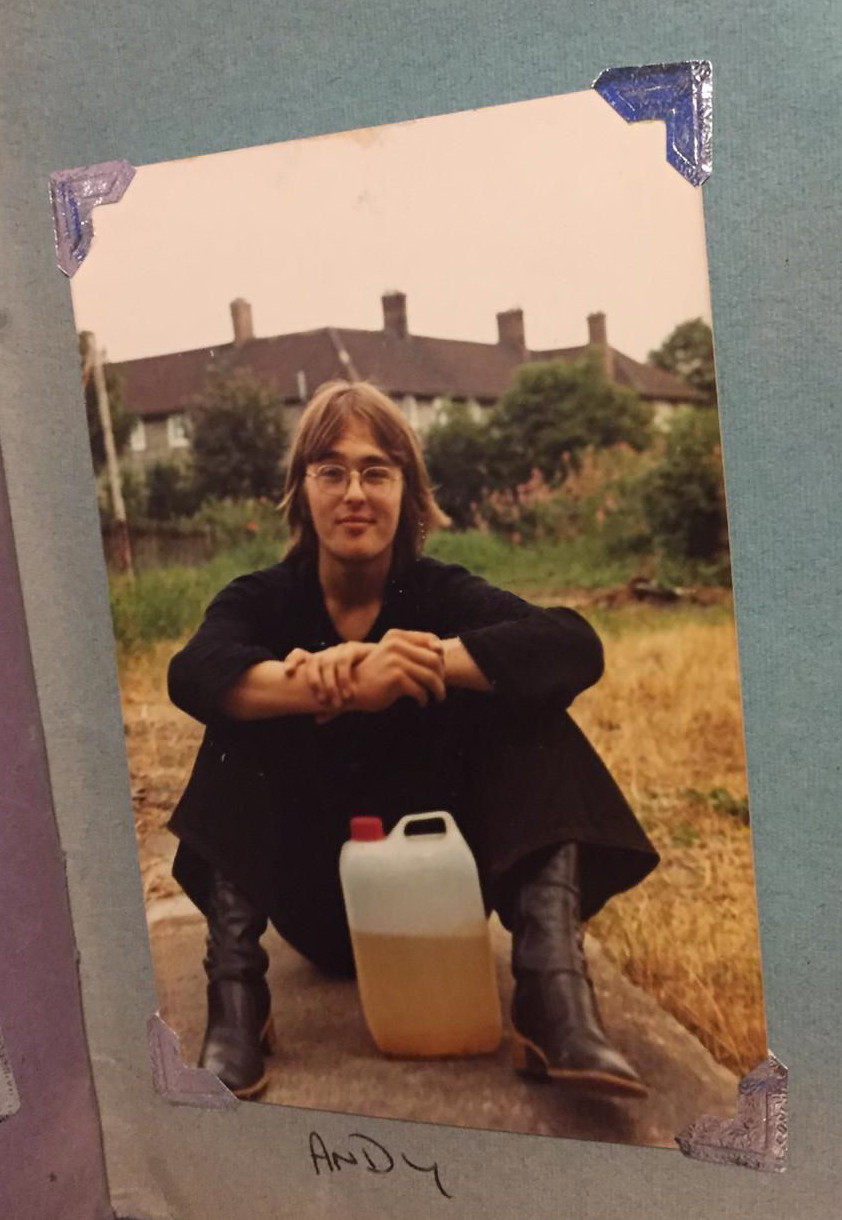
This is my start point:
Now, follow the instructions for the method that you want to use, or try them both!
Using the Perspective tool
- From the menu, select tools>transform>Perspective (Shift-P).
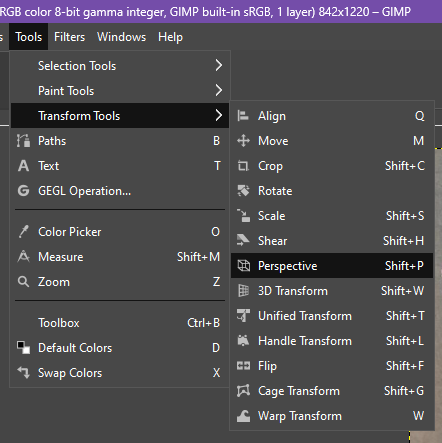
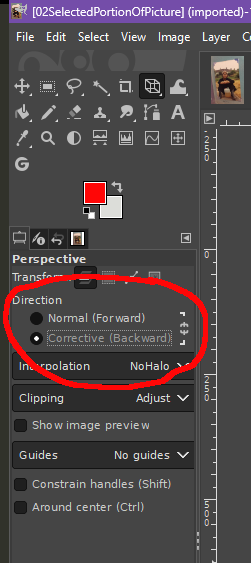
This brings up the Perspective control panel in the top right of the image panel, and four diagonal square handles are placed at the corners of the image. In the Tool Options panel, shown above, make sure that "Corrective (Backward)" mode is selected.
-
Drag the handles to the places on the image that will be the final corners.
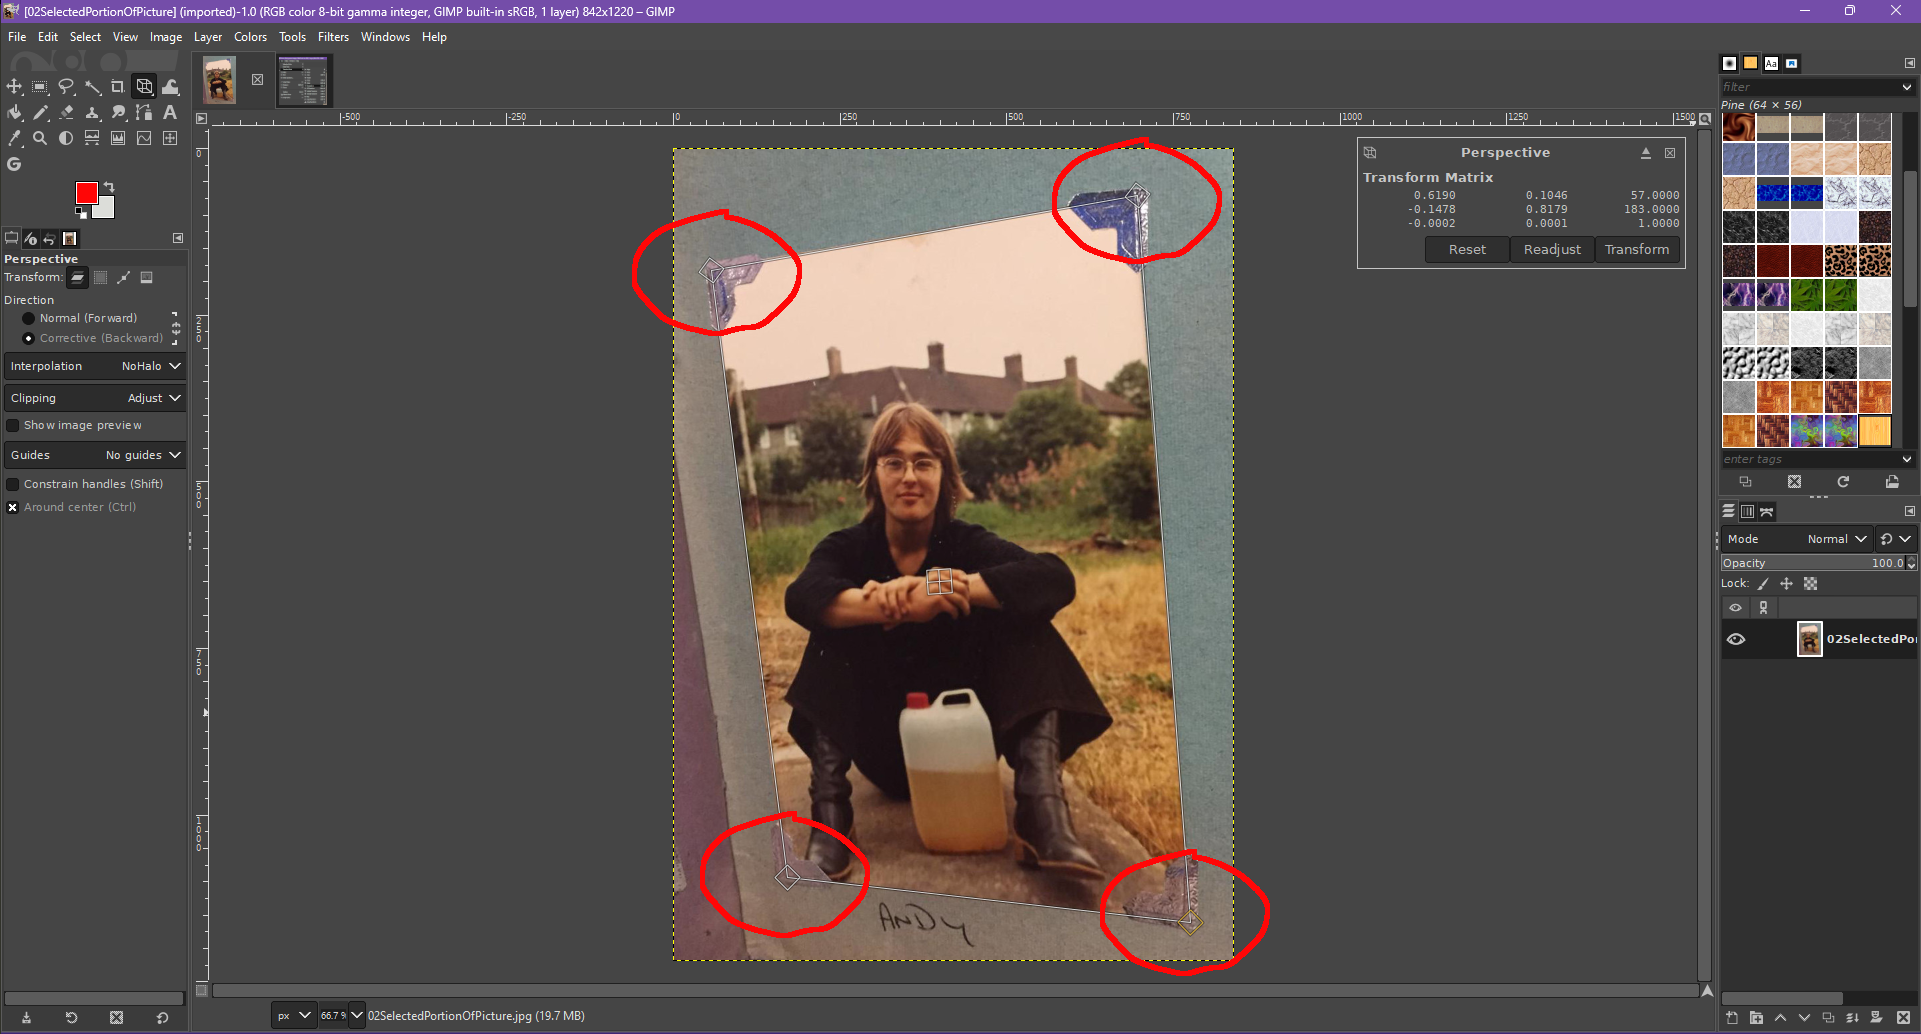
-
Press the Transform button.
Done
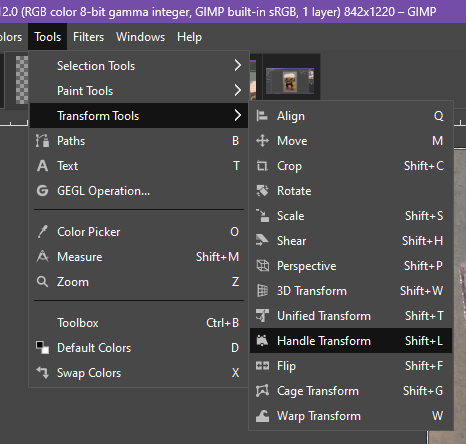
Using the Handle Transform tool
- From the menu, select tools>transform>handle (Shift-L).
This brings up the Handle Transform panel (top right of the image panel), and the mouse cursor becomes the handle cursor, .
You can just see the cursor in the image below to the right of the top right photo mount.
.
You can just see the cursor in the image below to the right of the top right photo mount.
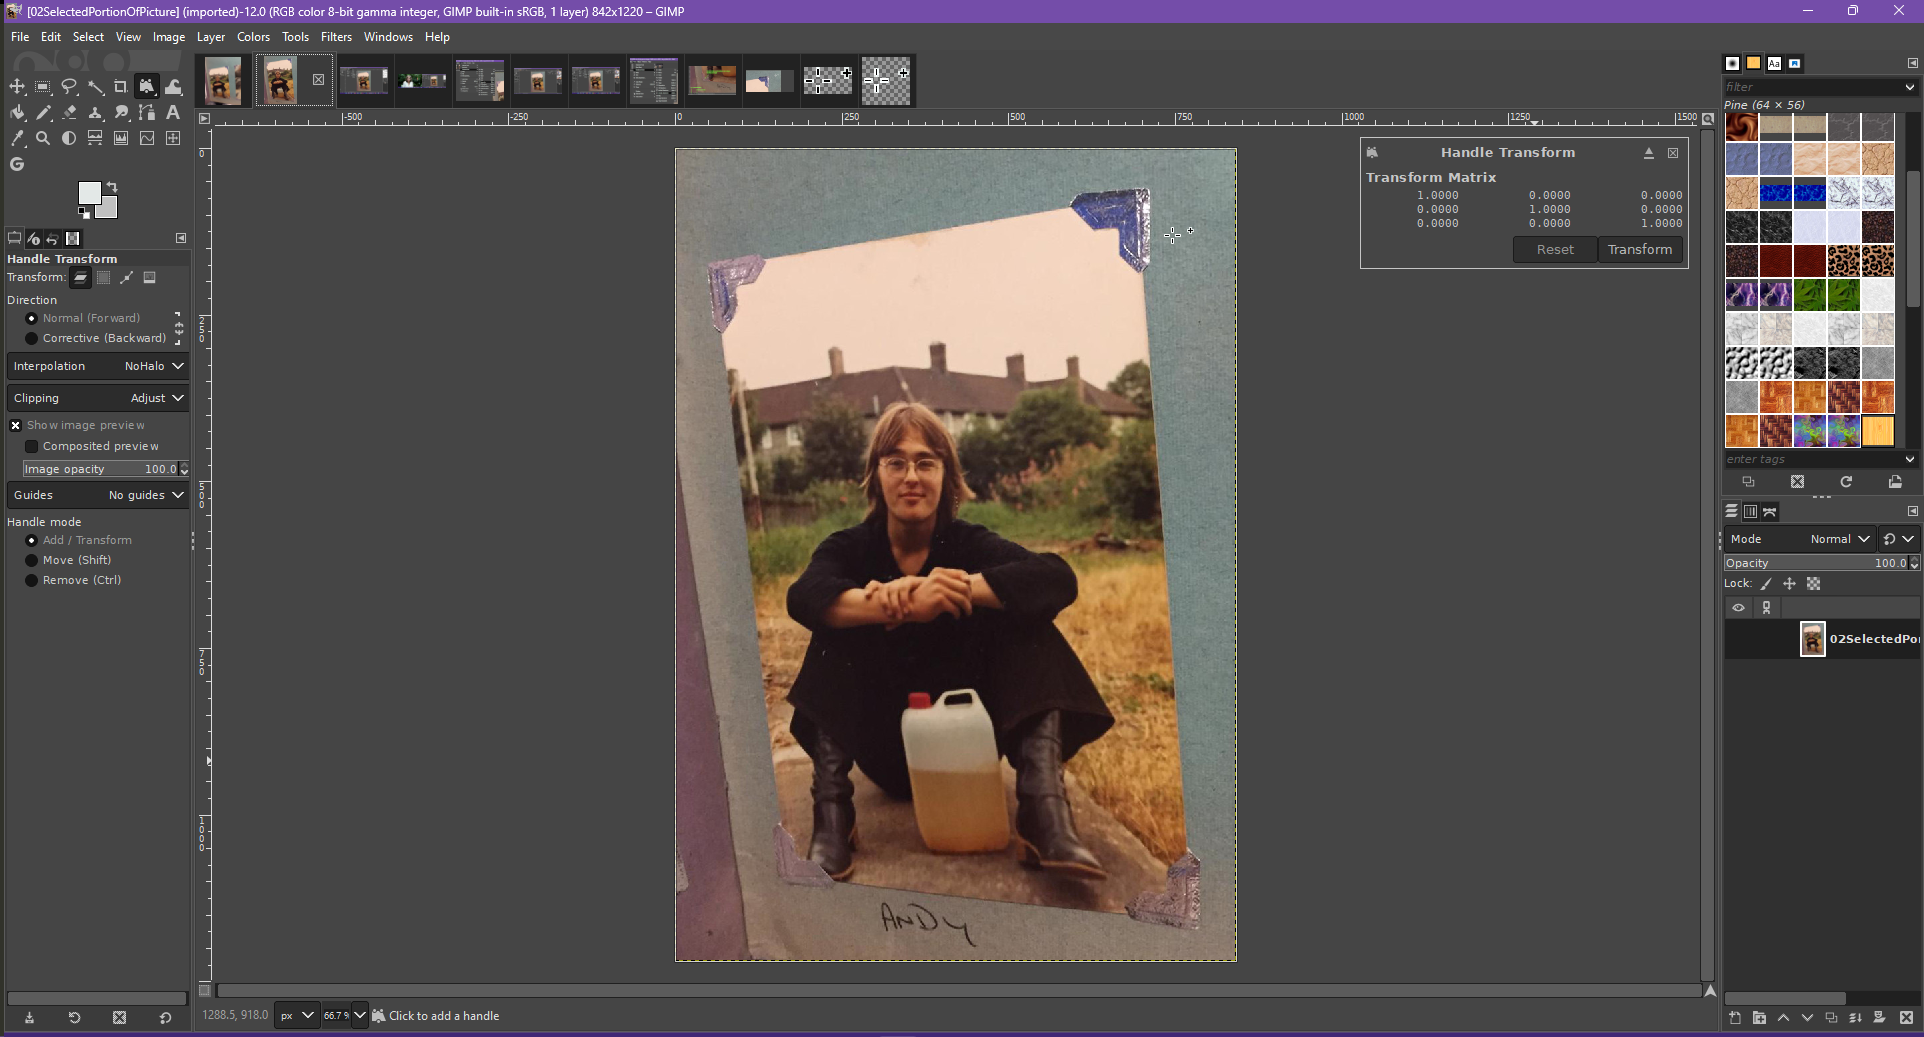
The handle cursor is used to select the points on the image that will become the new corners.
At this point, the quick and dirty fix is to select each of the corners by eye, and pull them to where you want the corners to be in the final image. The image is stretched to fit as the corners are dragged.However, for best results I would recommend an extra step.
-
As you select the four corners of the photo make a note of the coordinates, just write them down on a
piece of paper, put them in a worksheet (or whatever you prefer).
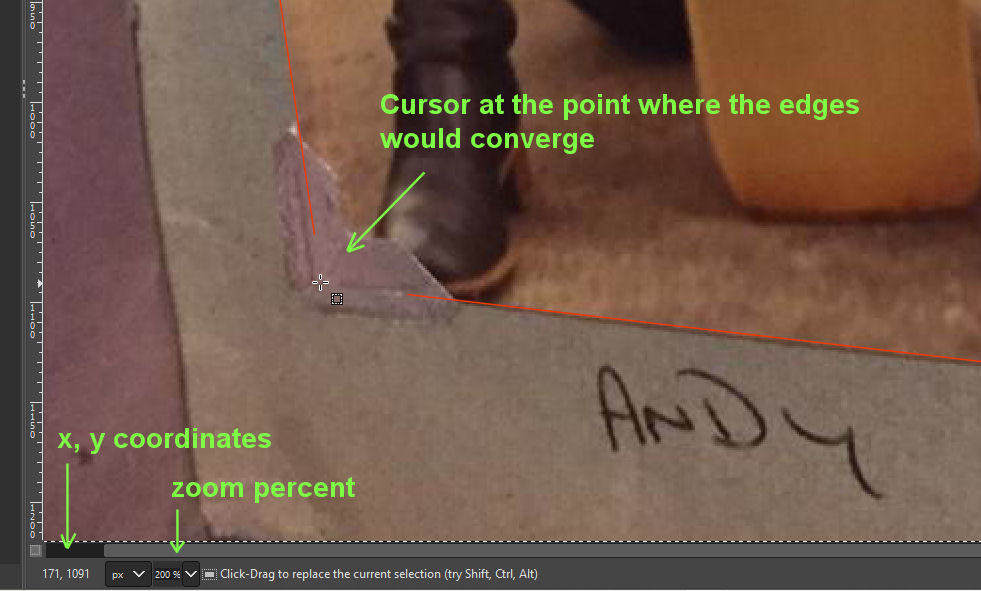
For example, in the image below the cursor is over the bottom left photo mount at the point of the bottom left of the image. The arrow indicates the x, y coordinates of the cursor position, 171 pixels from the left, and 1091 pixels from the top. Repeat as you select the other corners of the photo.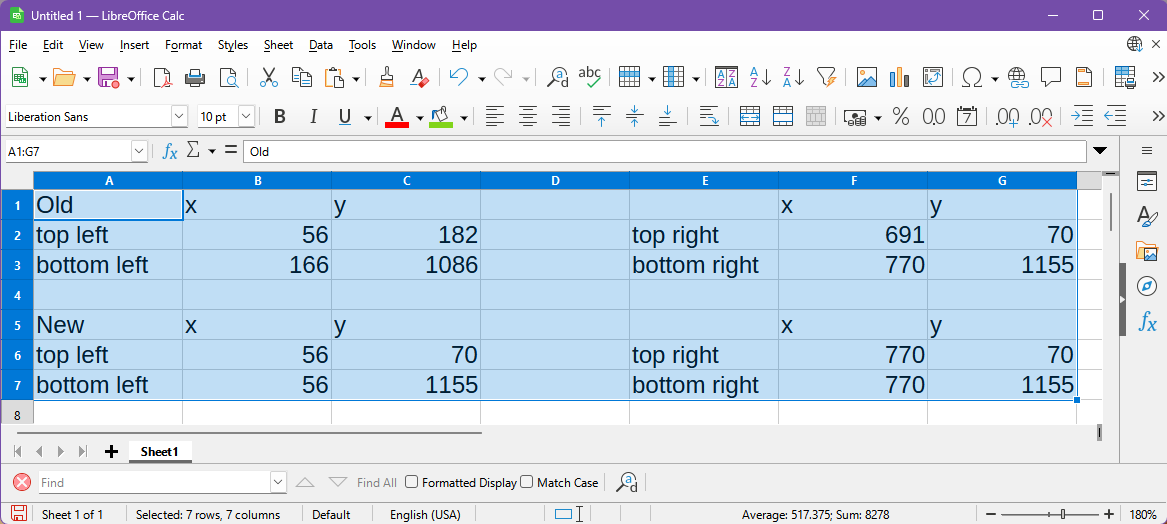
Why do this? It helps make precise alignment of the corners when they are dragged.
If you make the x values for the two left corners the same then both corners will be aligned the same distance from the left side. I have added these values to the worksheet in the "New" section, furthest left x is 56, so the new x values for both left corners is 56.
Similarly, if the x values of the two right corners are the same then the right sides will be lined up. In the worksheet, furthest right x is 770, so the new x value for both right corners is 770.
Now do the same with the top and bottom pairs of corners.
Use the value of the y coordinate of the top most corner, in my image top right, and set the other top corner to the same y value. I have also added these values to the worksheet, top right y is 70, new y values for both top corners is 70.
For the bottom edge, use the lowest corner's y value, in my image bottom right, and set the other bottom edge corner to the same y value. In the worksheet, the lowest value is 1155, the new y values for both bottom corners is 1155.
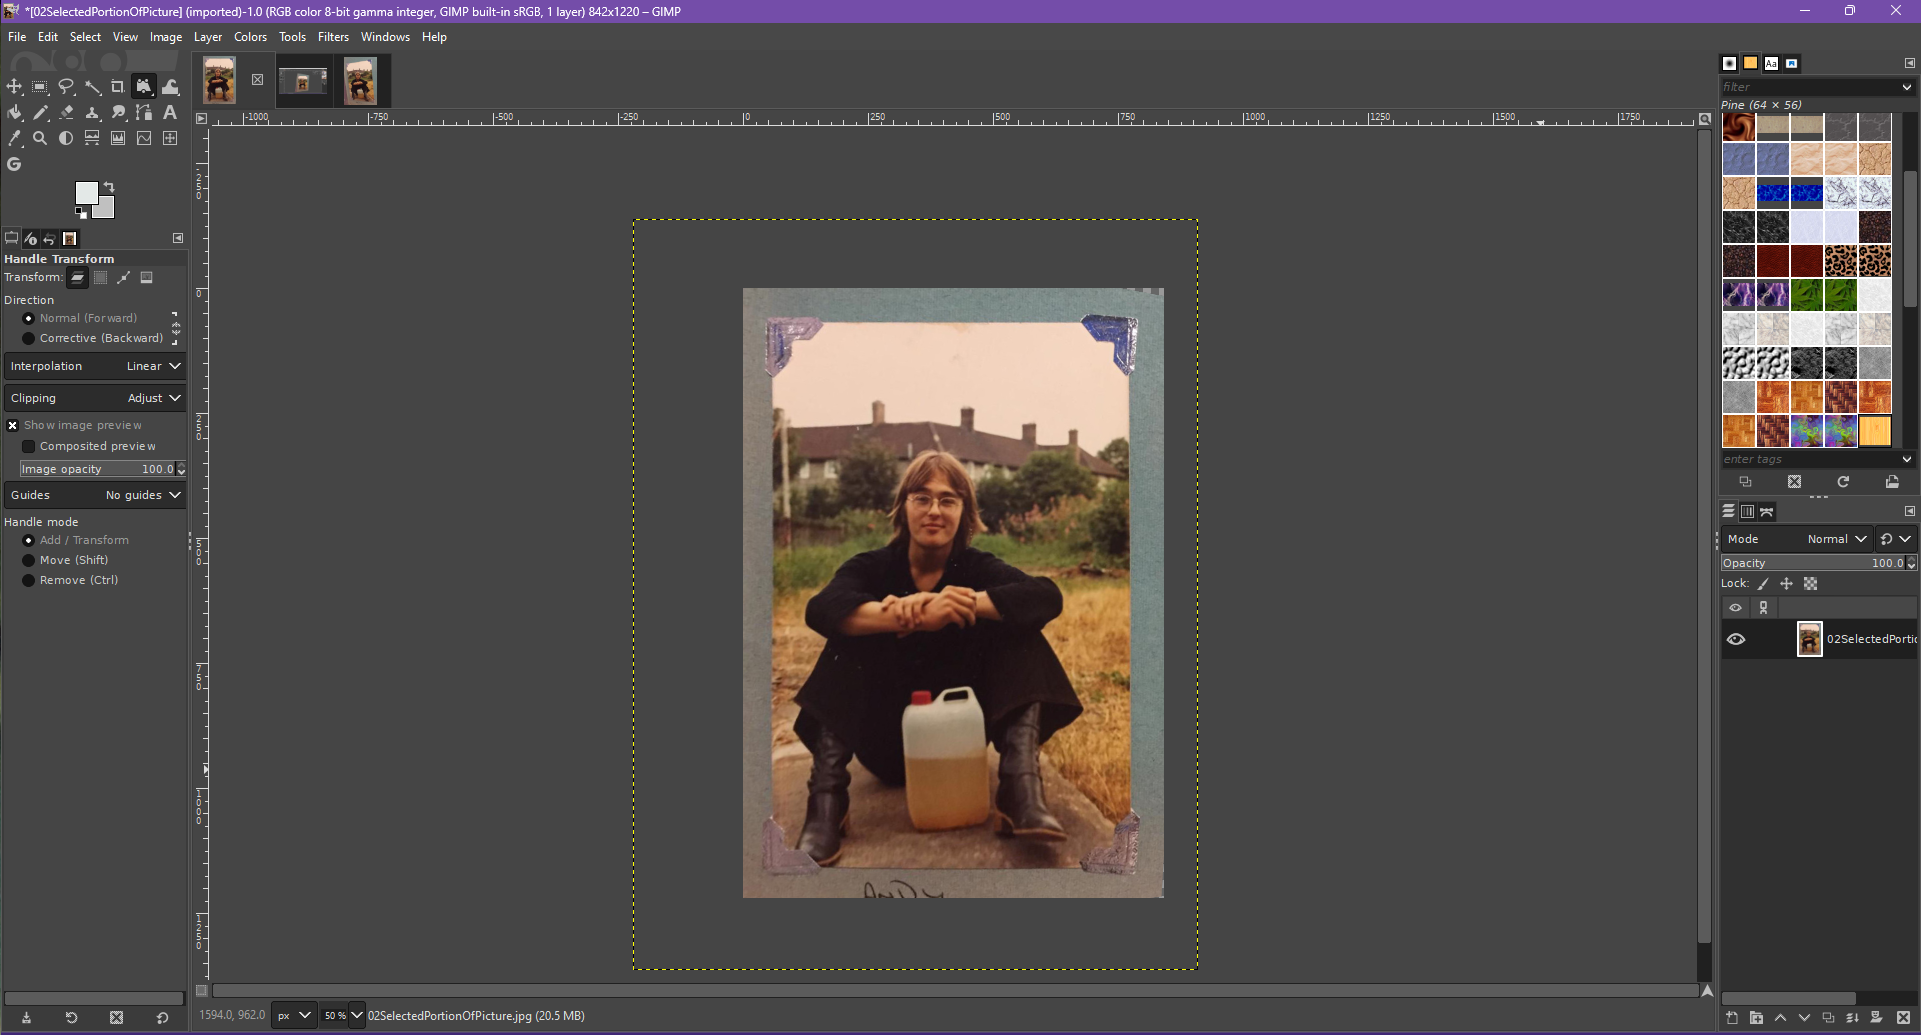
You should now have an image with two parallel sides, and upper and lower edges parallel, a nice rectangle.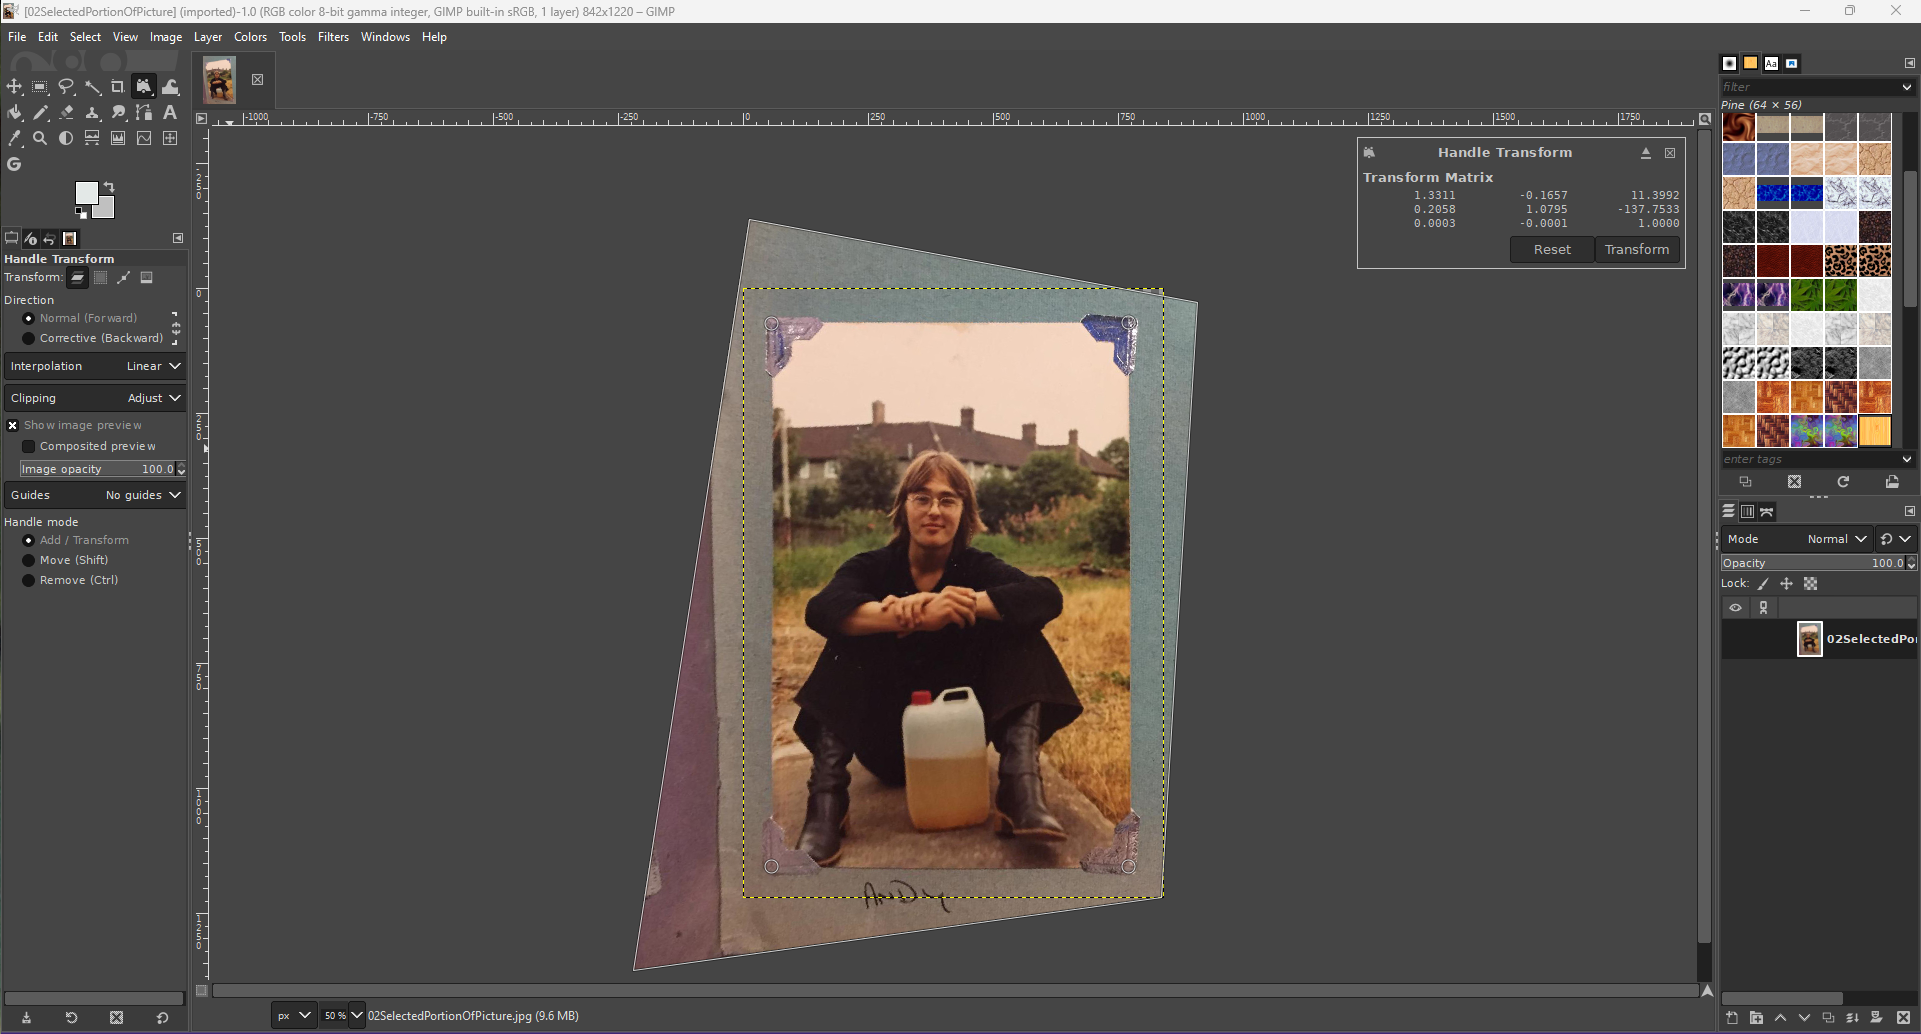
While you are busy and have the corner coordinates available, you could change the size of the image, or adjust its aspect ratio, width v/s height. When you are happy with the result, press the "transform" button to finalize the changes.
If you don't like the result, just use Ctrl-Z to step back to before you made the change and try again. This is where the notes about coordinates may help, you don't have to work them out all over again.
Only a couple, or four things left to do:
-
Aspect Ratio (width to height): The Perspective tool does its own thing as far as aspect ratio is concerned. With the Handle Transform, I generally find that choosing the tallest and widest combination of coordinates gives a reasonable result, but if the image is too wide or too tall you may want to adjust it. With the Handle Transform, as mentioned, you can do this by making the image wider or taller when adjusting the handles. After the event, and for both methods, you could use "Image>scale image" from the image menu and setting a new height or width by un-linking the chain icon next to image size.

-
Adjust/Remove the border from the image: Use rectangle select "R" to select the wanted part of the image, and Image>Crop to selection.
-
Remove the photo mounts: Erase the upper ones using the clone brush? The lower ones? That's a bit trickier!!
-
A bit of color correction?? When I get started I never know when to stop...!!
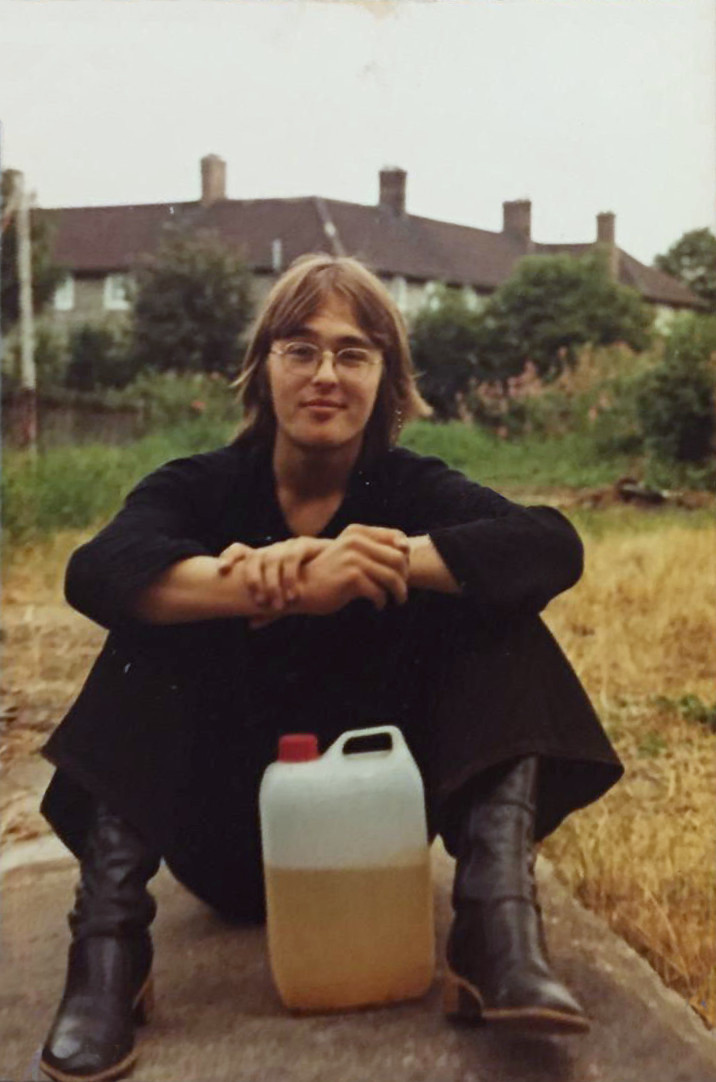
What a handsome chap, I wonder what he was doing with the weed killer?!
If you have any questions, please get in touch at: comments@chisholm.nl.